
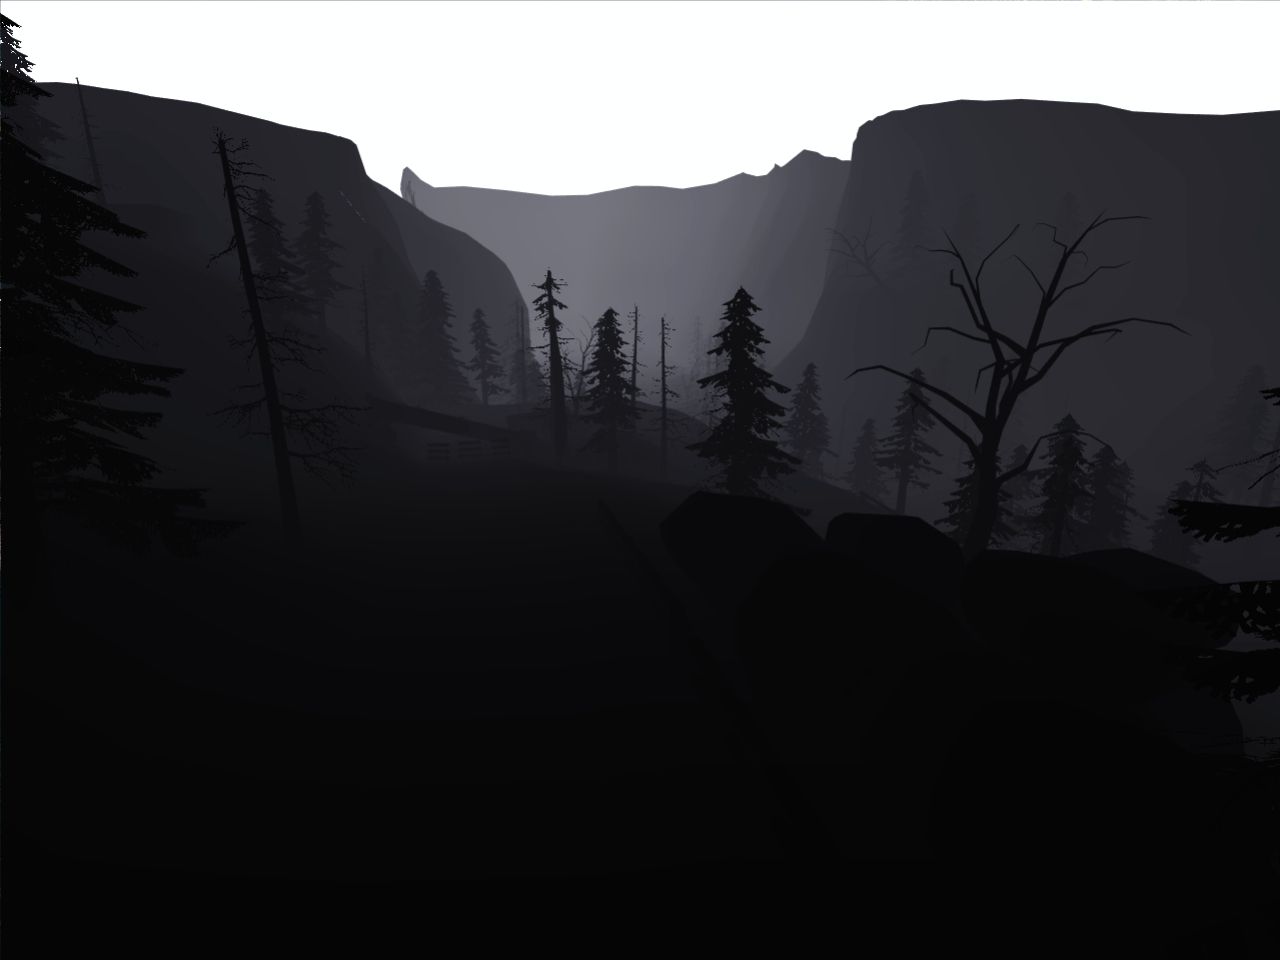
In my Shader Graph course, we create a simple shader to produce a rimmed effect where two objects overlap each other (as shown in the picture of the sphere embedded in the plane above).
The shader is applied to the sphere only and therefore colours the sphere only. But it colours the sphere with black and white values based on the depth of other objects behind it. But how?
The shader is applied to the sphere only and therefore colours the sphere only. But it colours the sphere with black and white values based on the depth of other objects behind it. But how?
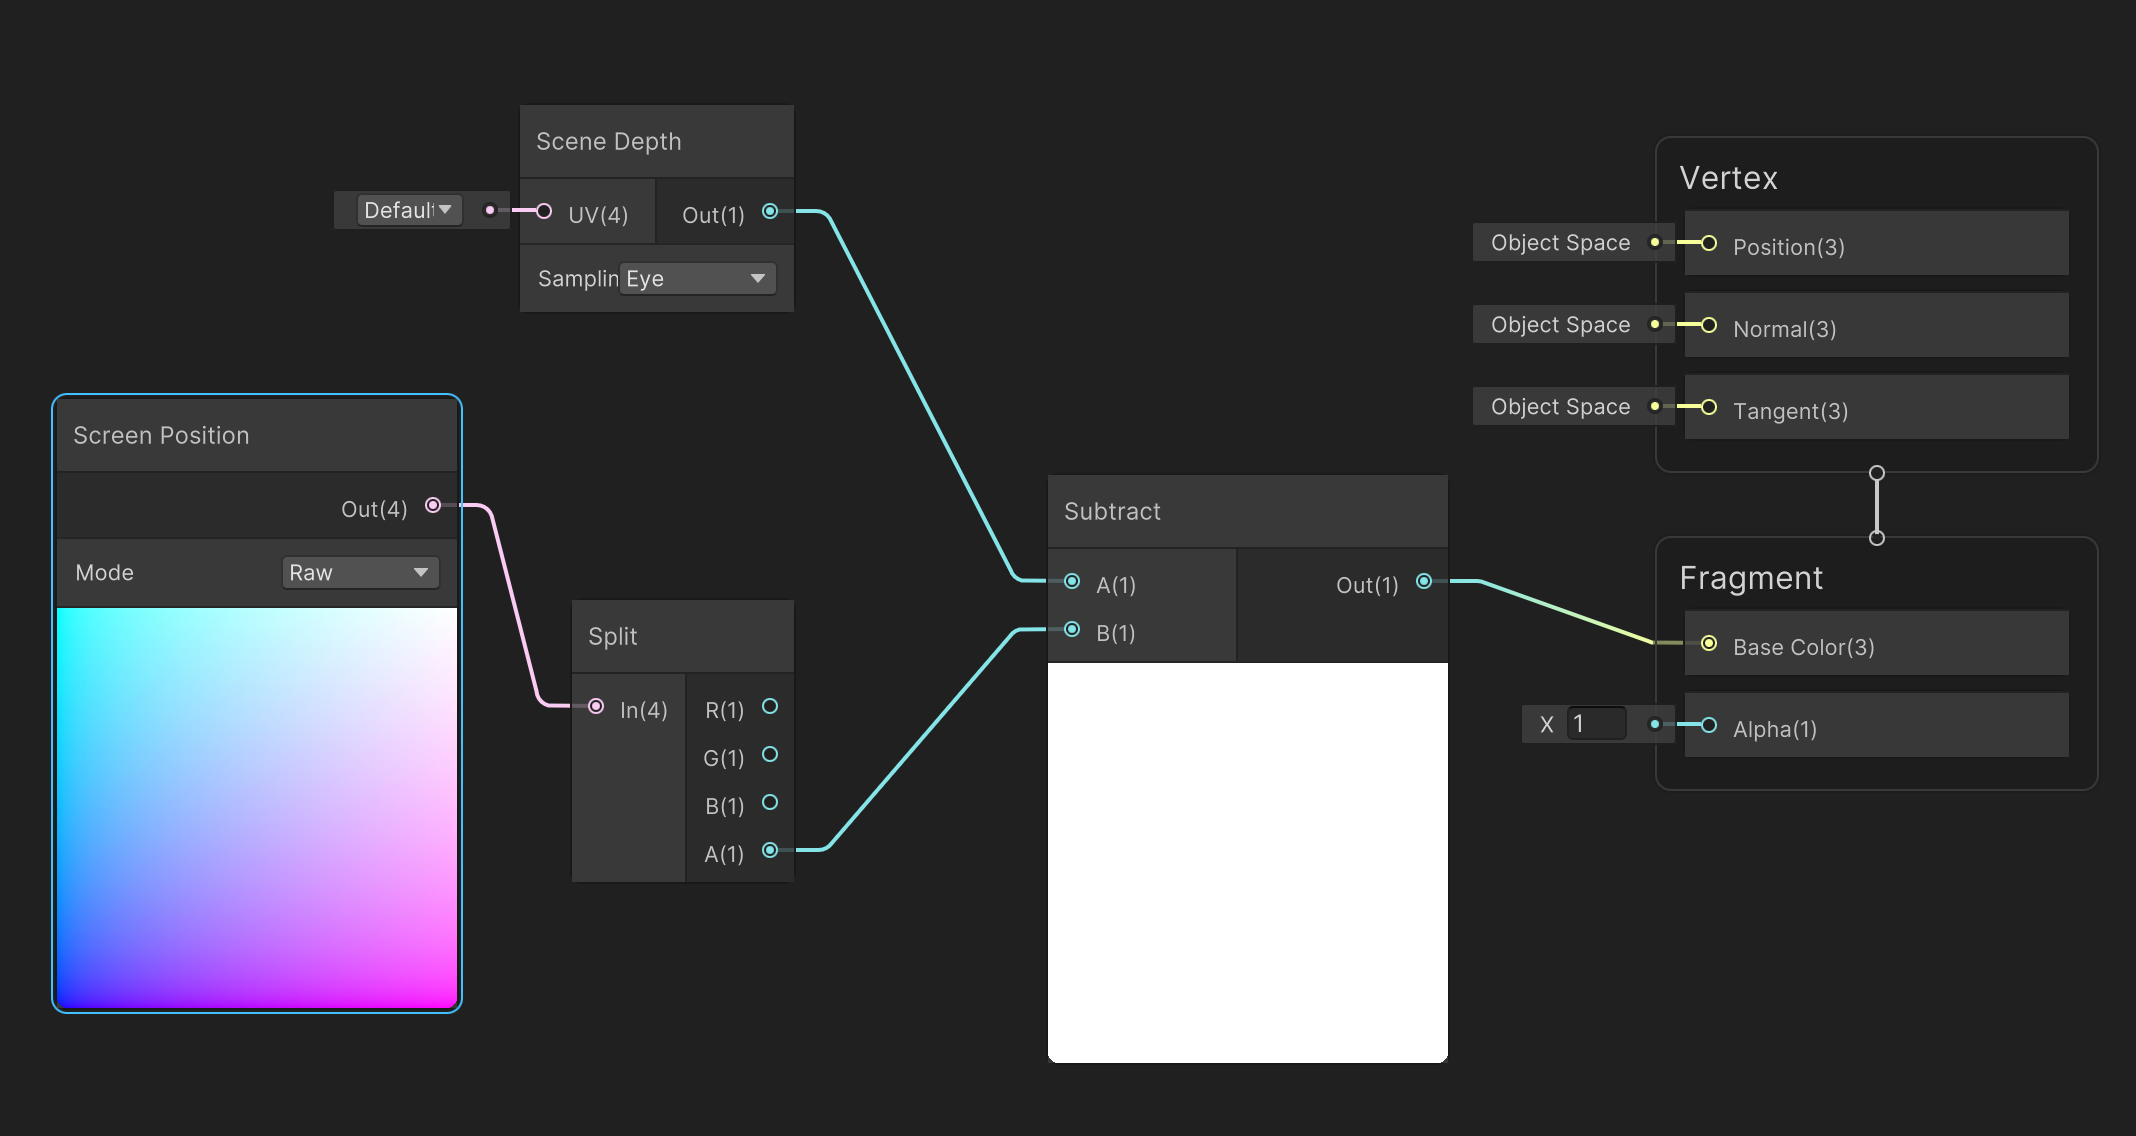
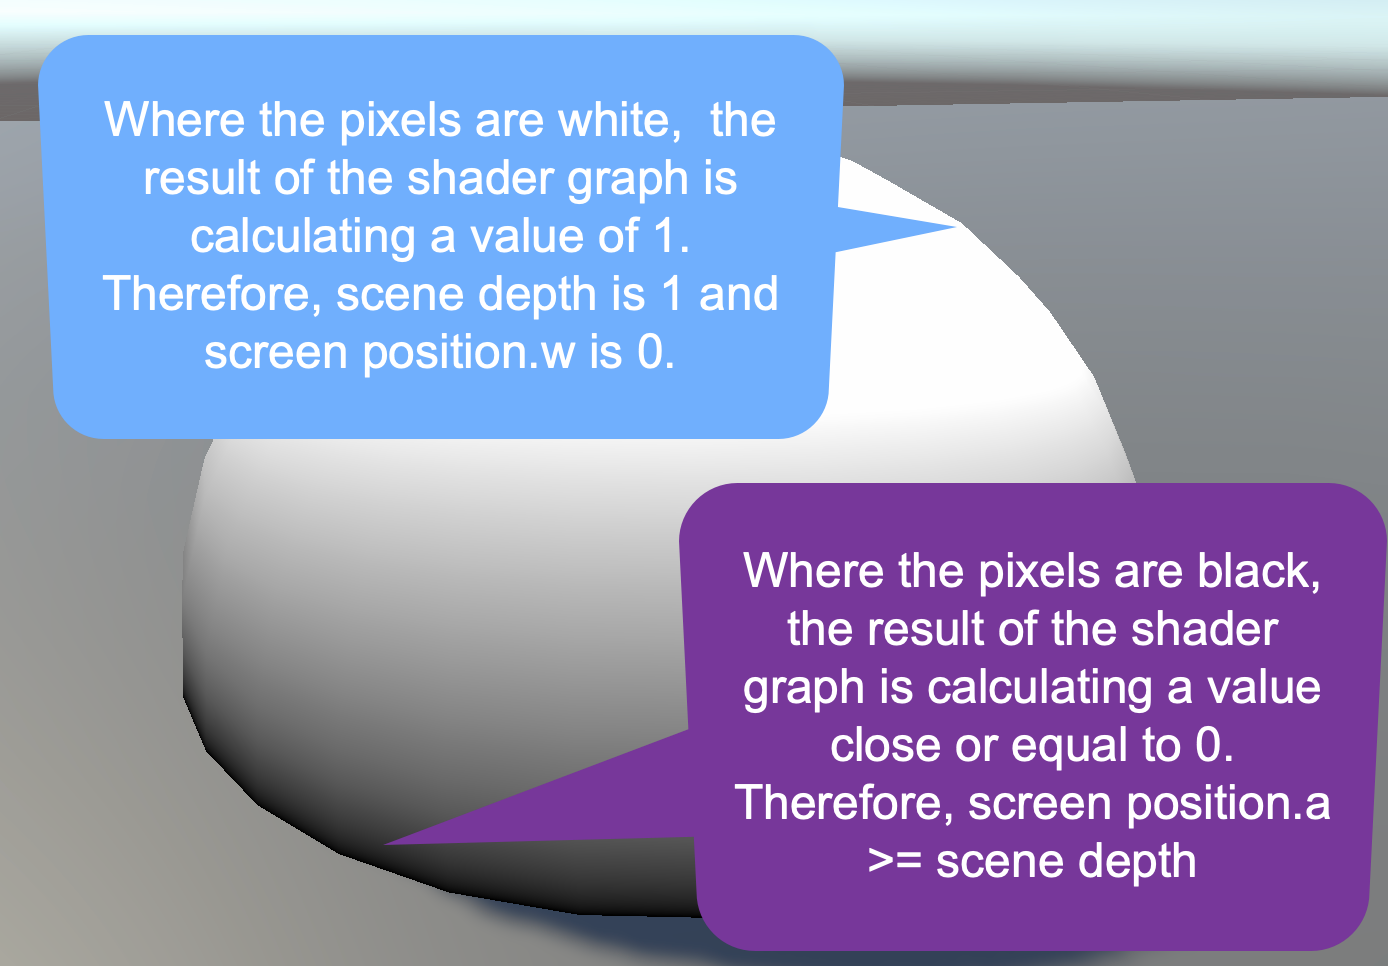
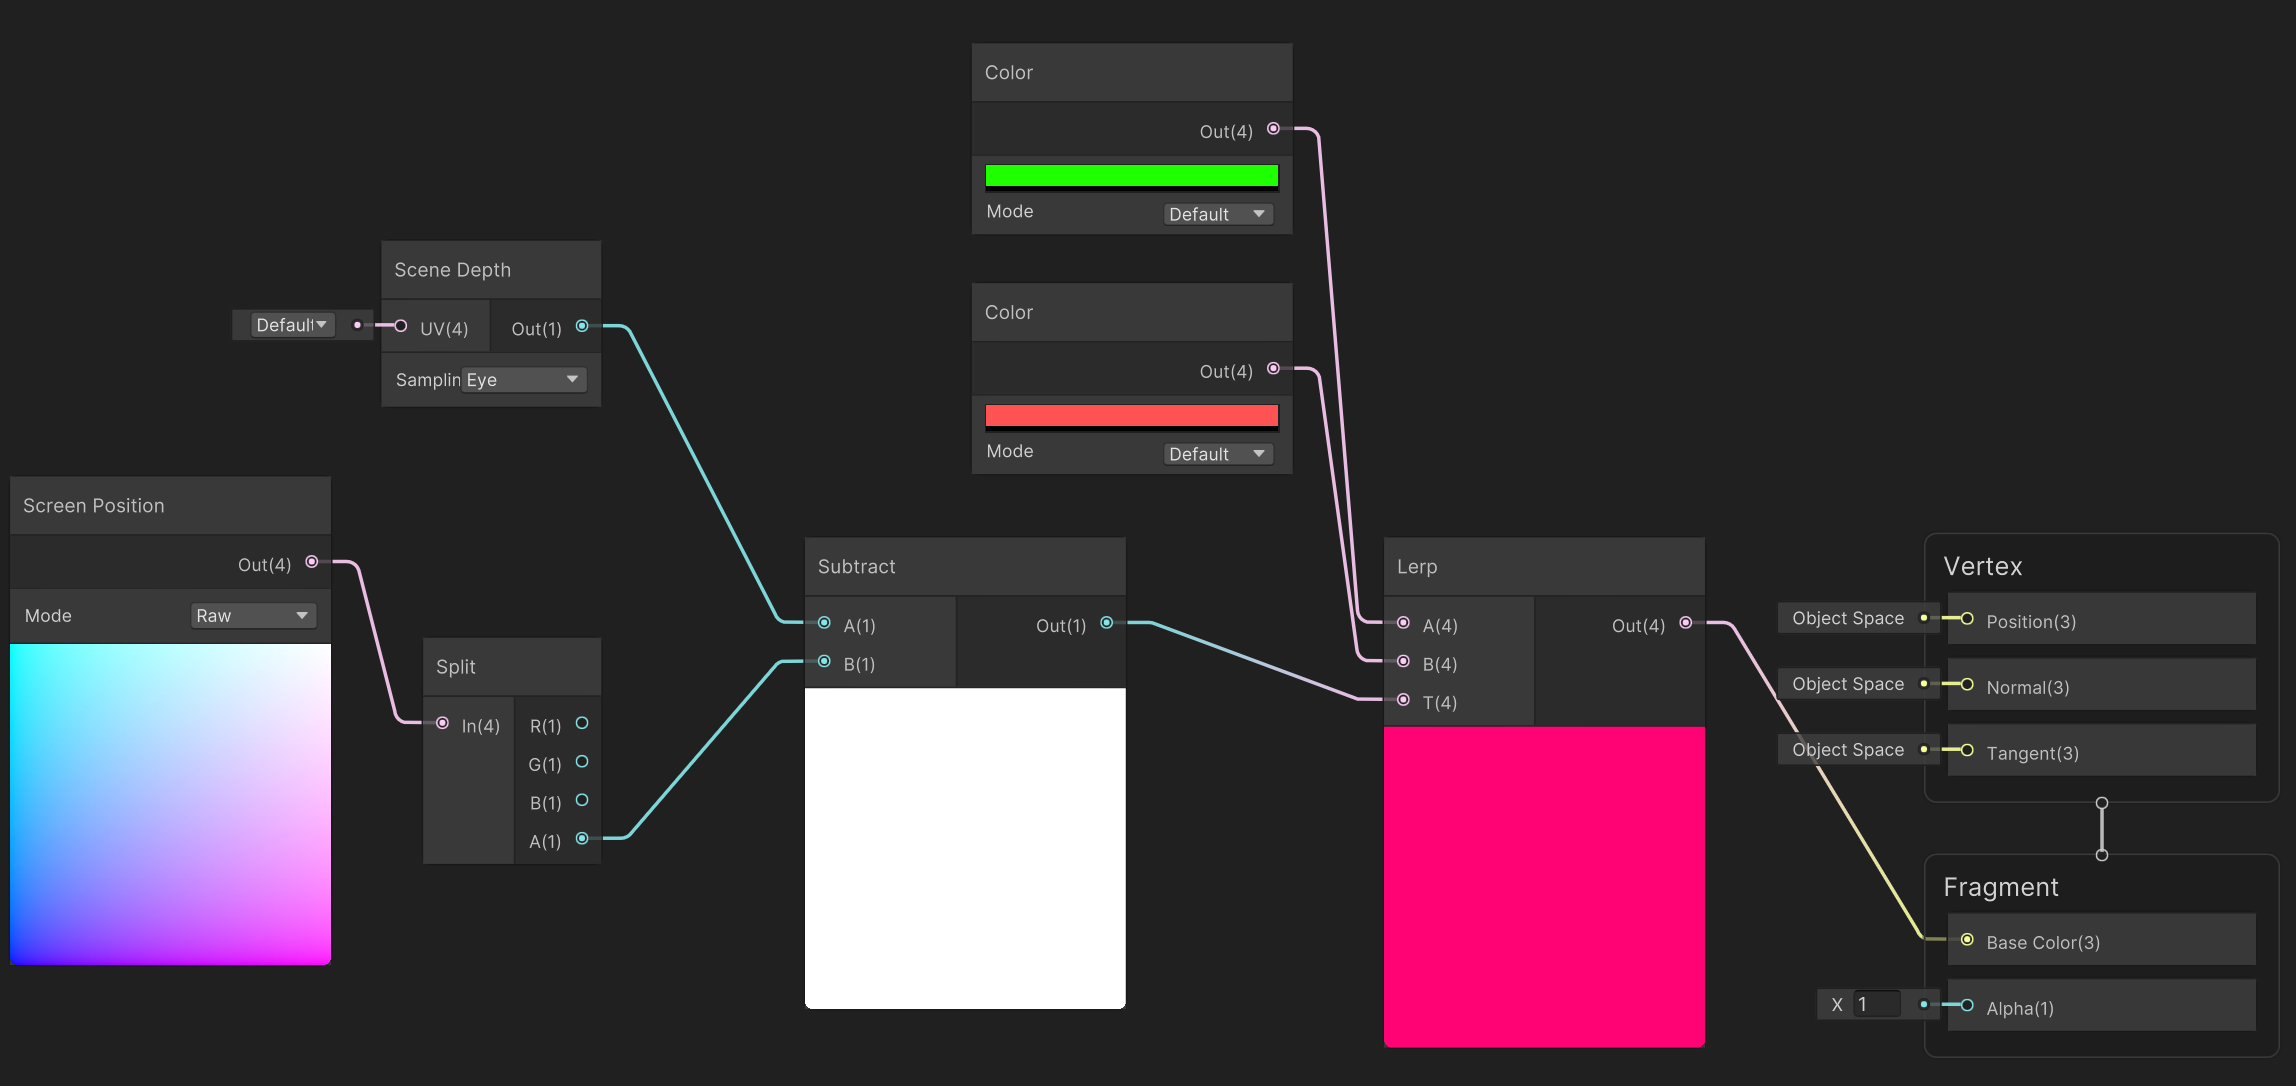
So how does this shader work? The Scene Depth node gets the depth of the scene at the currently being processed pixel location. This depth value is taken from the z-buffer or depth buffer. As every object in the scene is drawn, it's normalised depth in the scene is recorded in a grey scale image. Furtherest points from the camera are recorded as 1 (white) and closest points 0 (black).
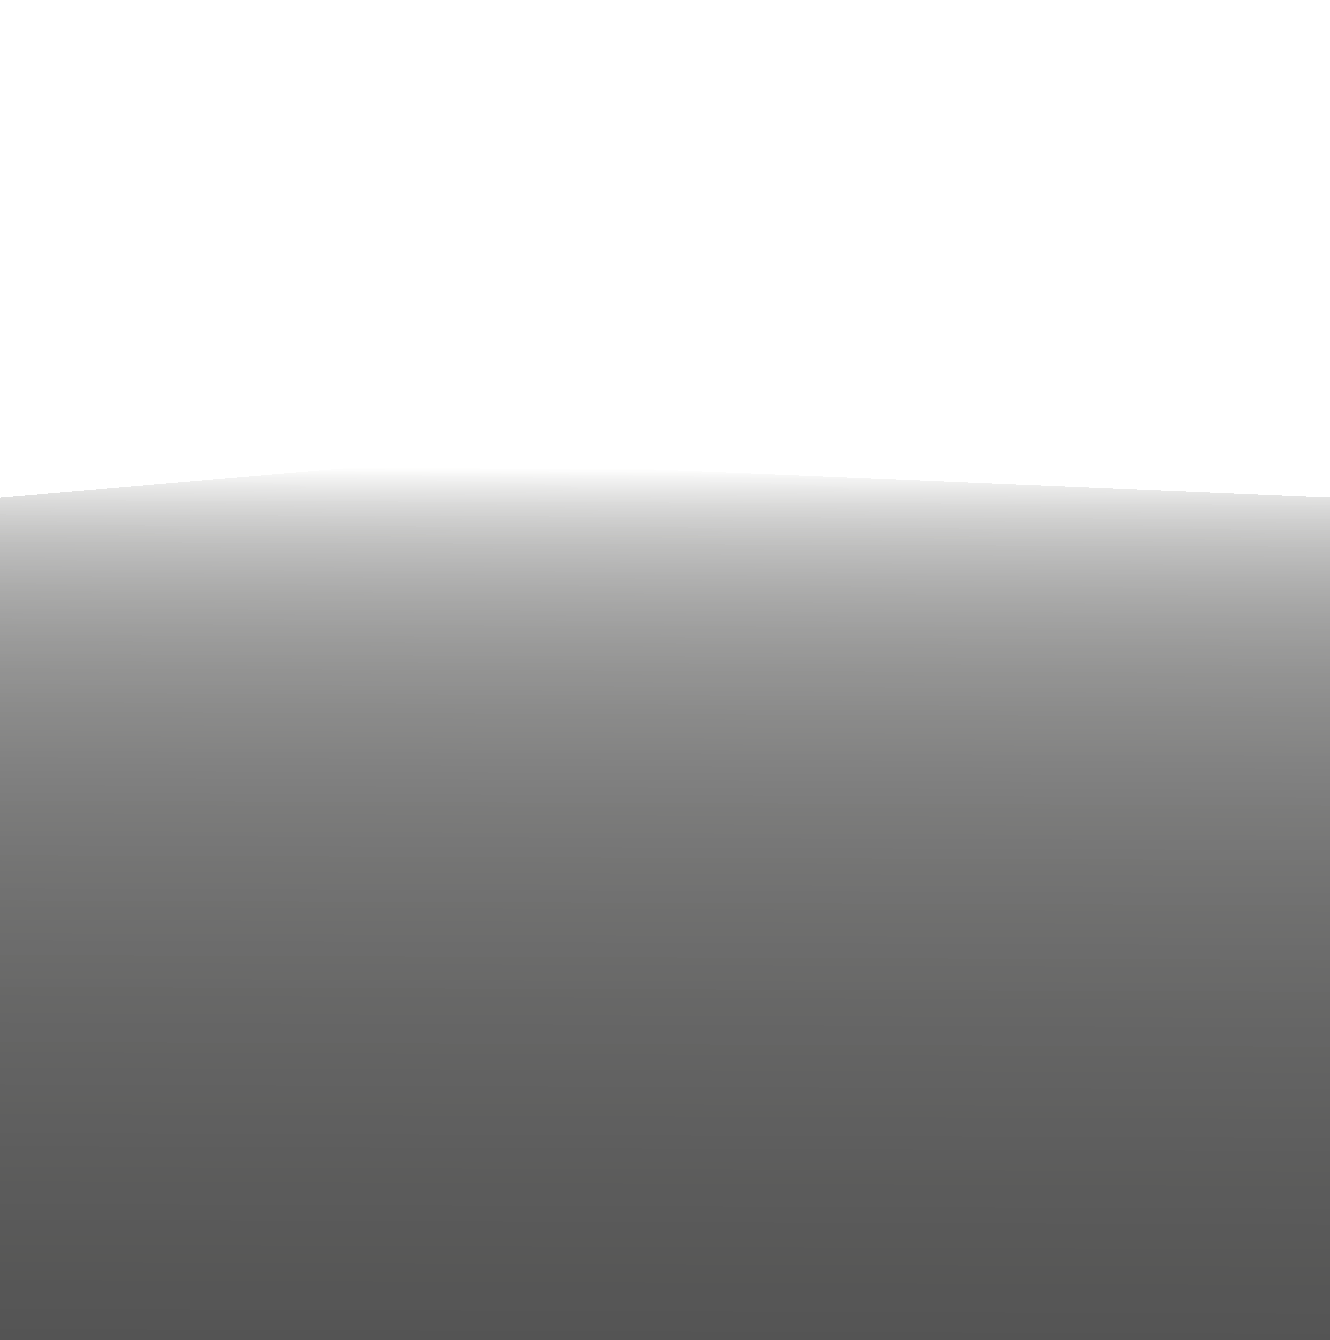
In the simple scene of the plane and sphere, the plane is the first thing drawn as it is an opaque object. This results in a depth buffer that looks like this.
When the sphere is drawn, the screen position depth, which is the w (same as alpha) value of the float4.
Because the sphere is not yet drawn in the depth buffer, it's depth value can't be taken from there. Instead, the raw screen depth is used as the w value is essentially the depth of the sphere pixel (normalised).
By using a subtract node in the shader to take the screen position depth away from the z buffer depth, we are getting the difference in the depth at any pixel location. The larger the gap in depth, the closer to 1 the final value will calculate to and produce a colour close to white. The smaller the gap, the closer to 0 and the colour will be black.
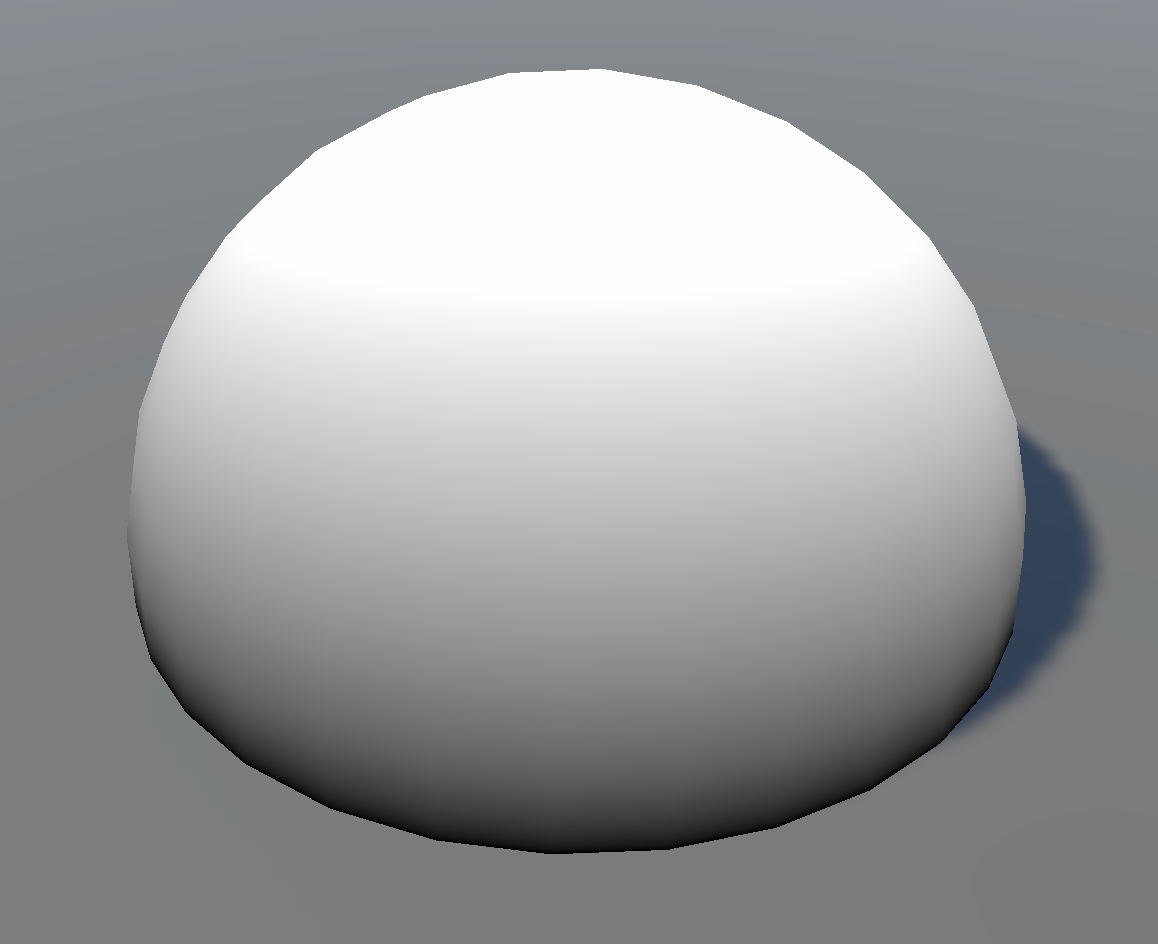
In that way we can produce this rimmed effect where two objects are close to each other with respect to their depth from the camera.
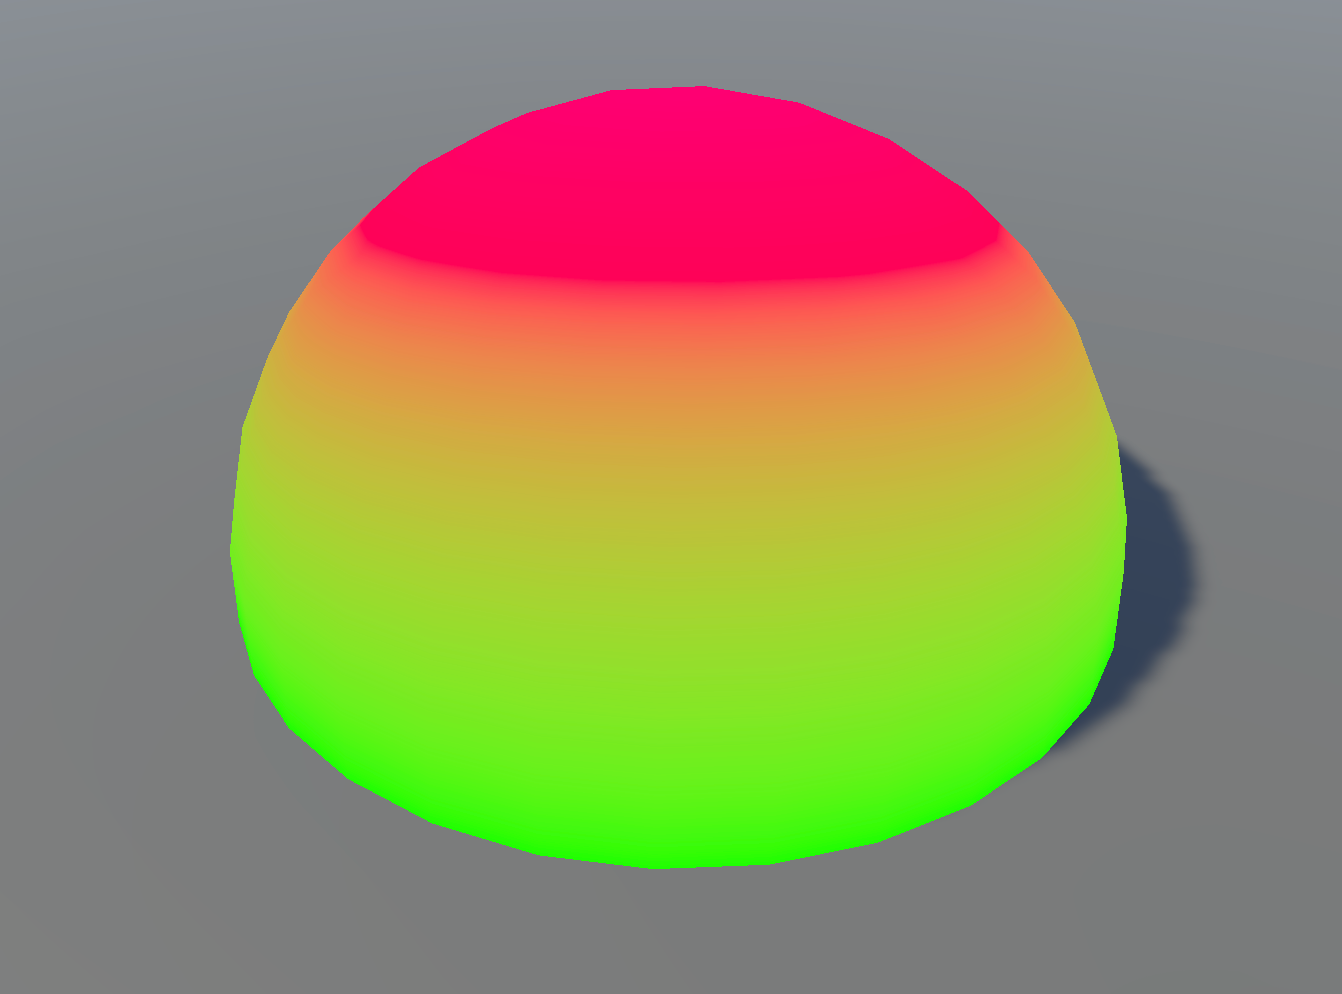
This this black and white depth colouring result, you can then use it in a lerp node to change the colours.
The shader graph can be modified to include colours like this:
The shader graph can be modified to include colours like this:

We are an online educational platform that helps professionals and aspiring individuals to succeed in their game development goals.